Save sent items in shared mailbox with PowerShell ALI TAJRAN
Shared Mailboxes are independent mailboxes which can be accessed by one or multiple people at the same time. All emails addressed to these mailboxes are only received within these mailboxes unless you configure a rule to forward/redirect the messages to another mailbox or distribution group as well. Shared Mailboxes have always behaved like that.
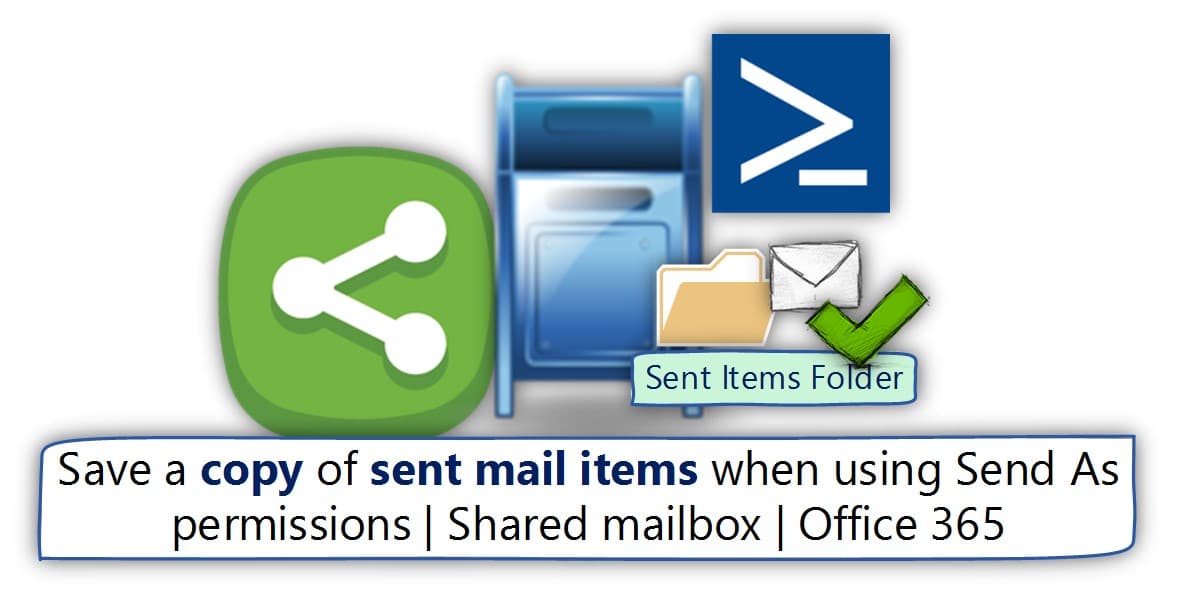
Save a copy of sent mail items when using Send As permissions Shared mailbox Office 365
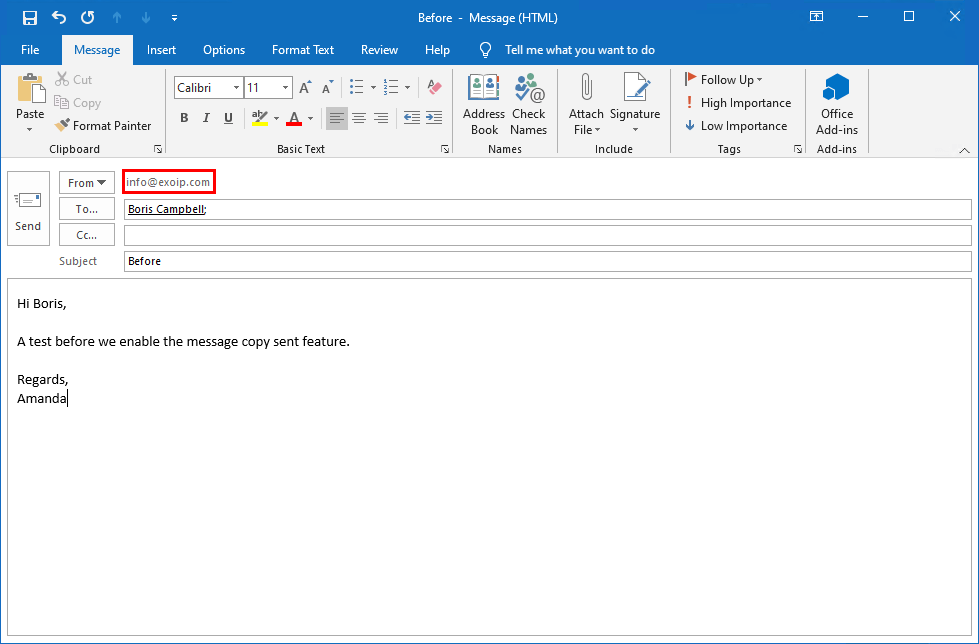
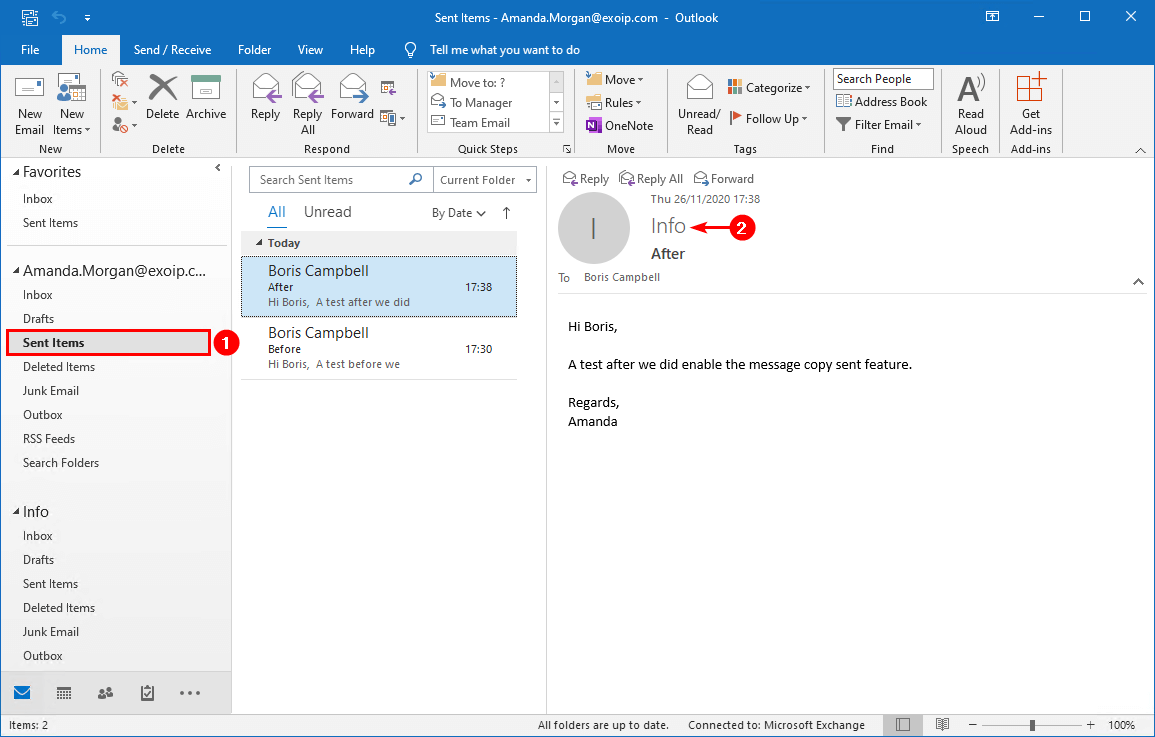
When a user sends an email from a shared mailbox, they will see a copy of the email in the Sent Items folder of the shared mailbox and personal mailbox. It's possible to avoid getting these emails in the Sent Items folder of the user in Outlook. In this article, you will learn how to save copy items sent only in the shared mailbox of Outlook.
How to Save Sent Items in Shared Mailbox Microsoft 365 Scripts
1 comment Report a concern I have the same question 1 Andy David - MVP 135.6K • MVP Mar 24, 2021, 4:30 AM Not really. You could create an Outlook rule, but it will only run on that machine and there isnt a great way to handle that when sending as a shared mailbox: Image is no longer available. 0 votes Sign in to comment Accepted answer

Save Sent Items in shared mailbox Sent Items folder IT Walkthroughs
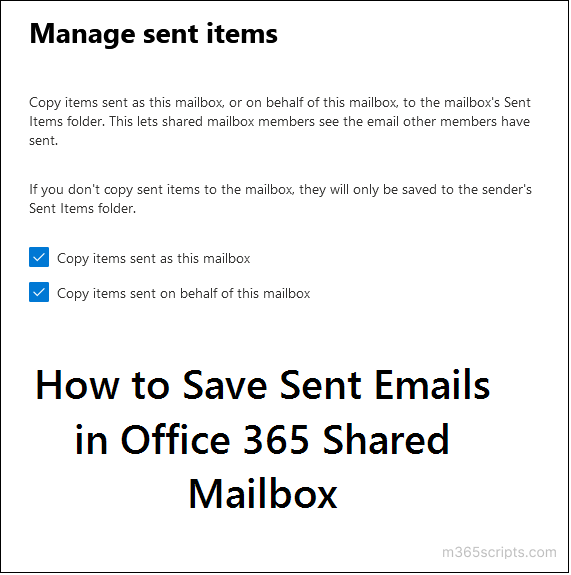
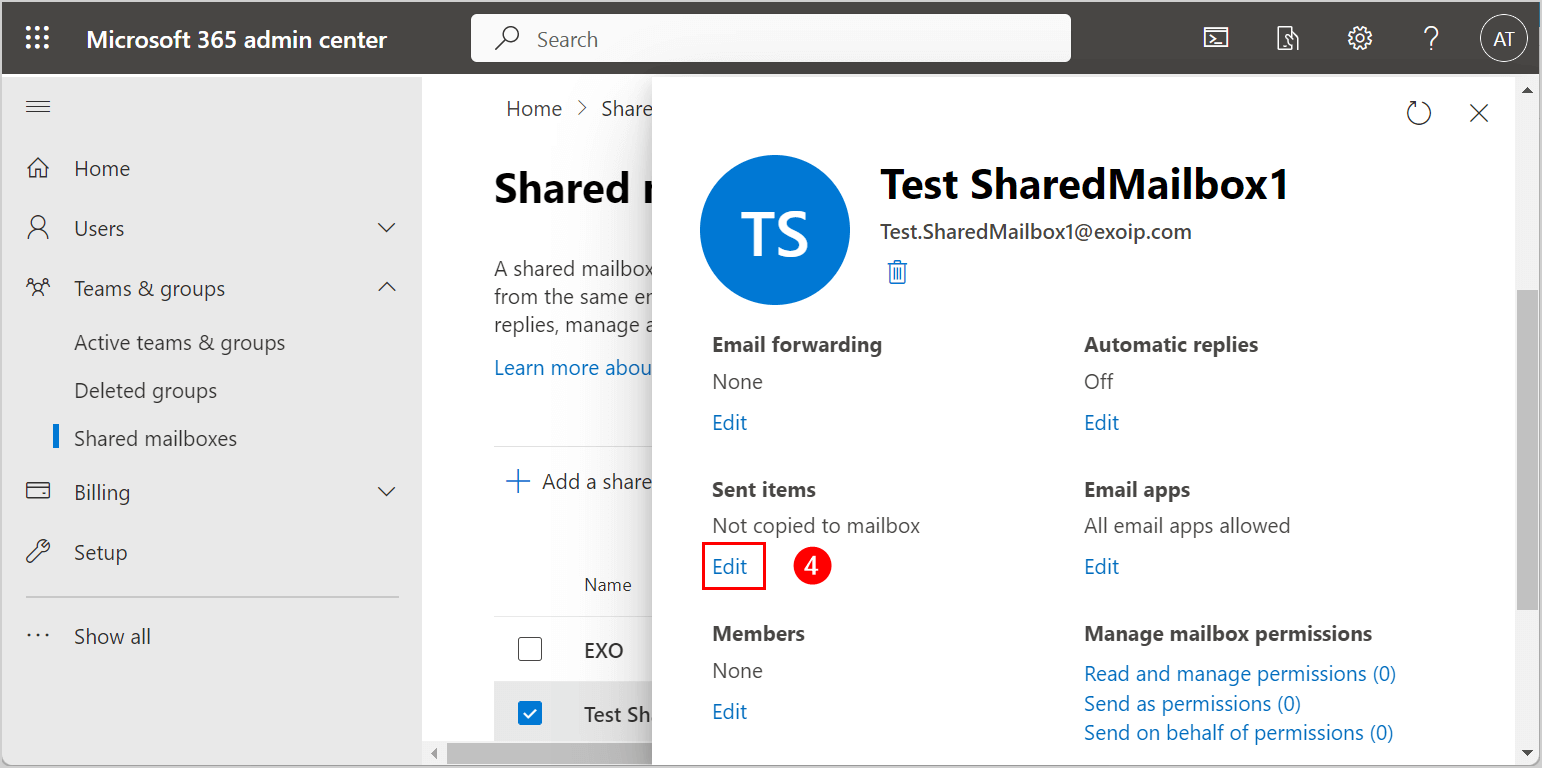
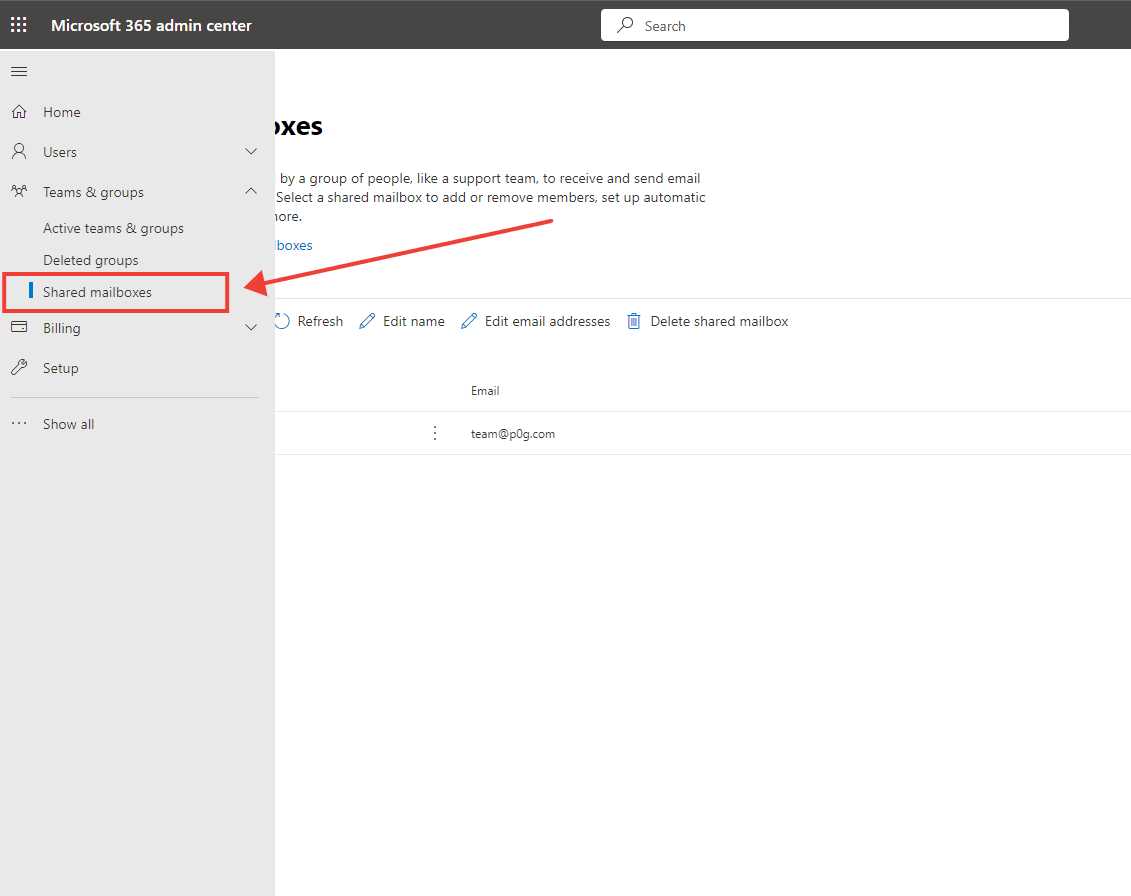
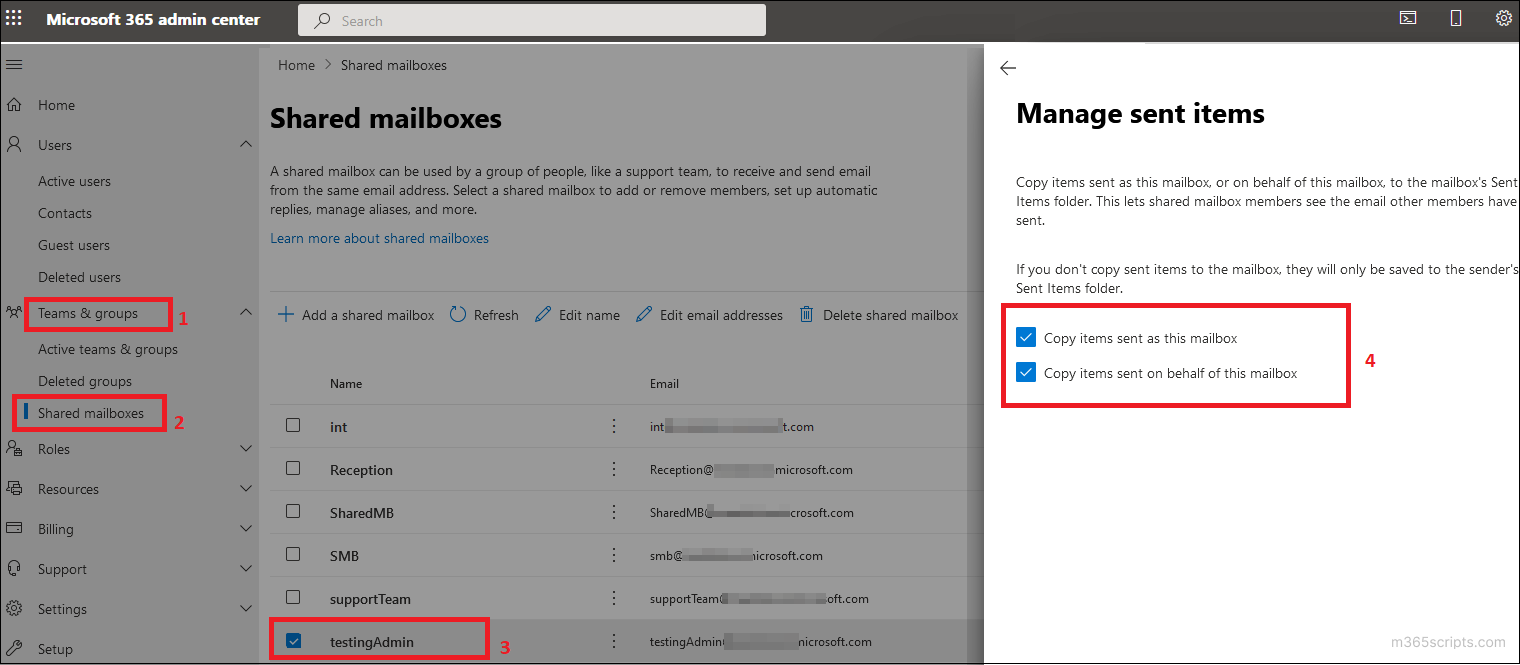
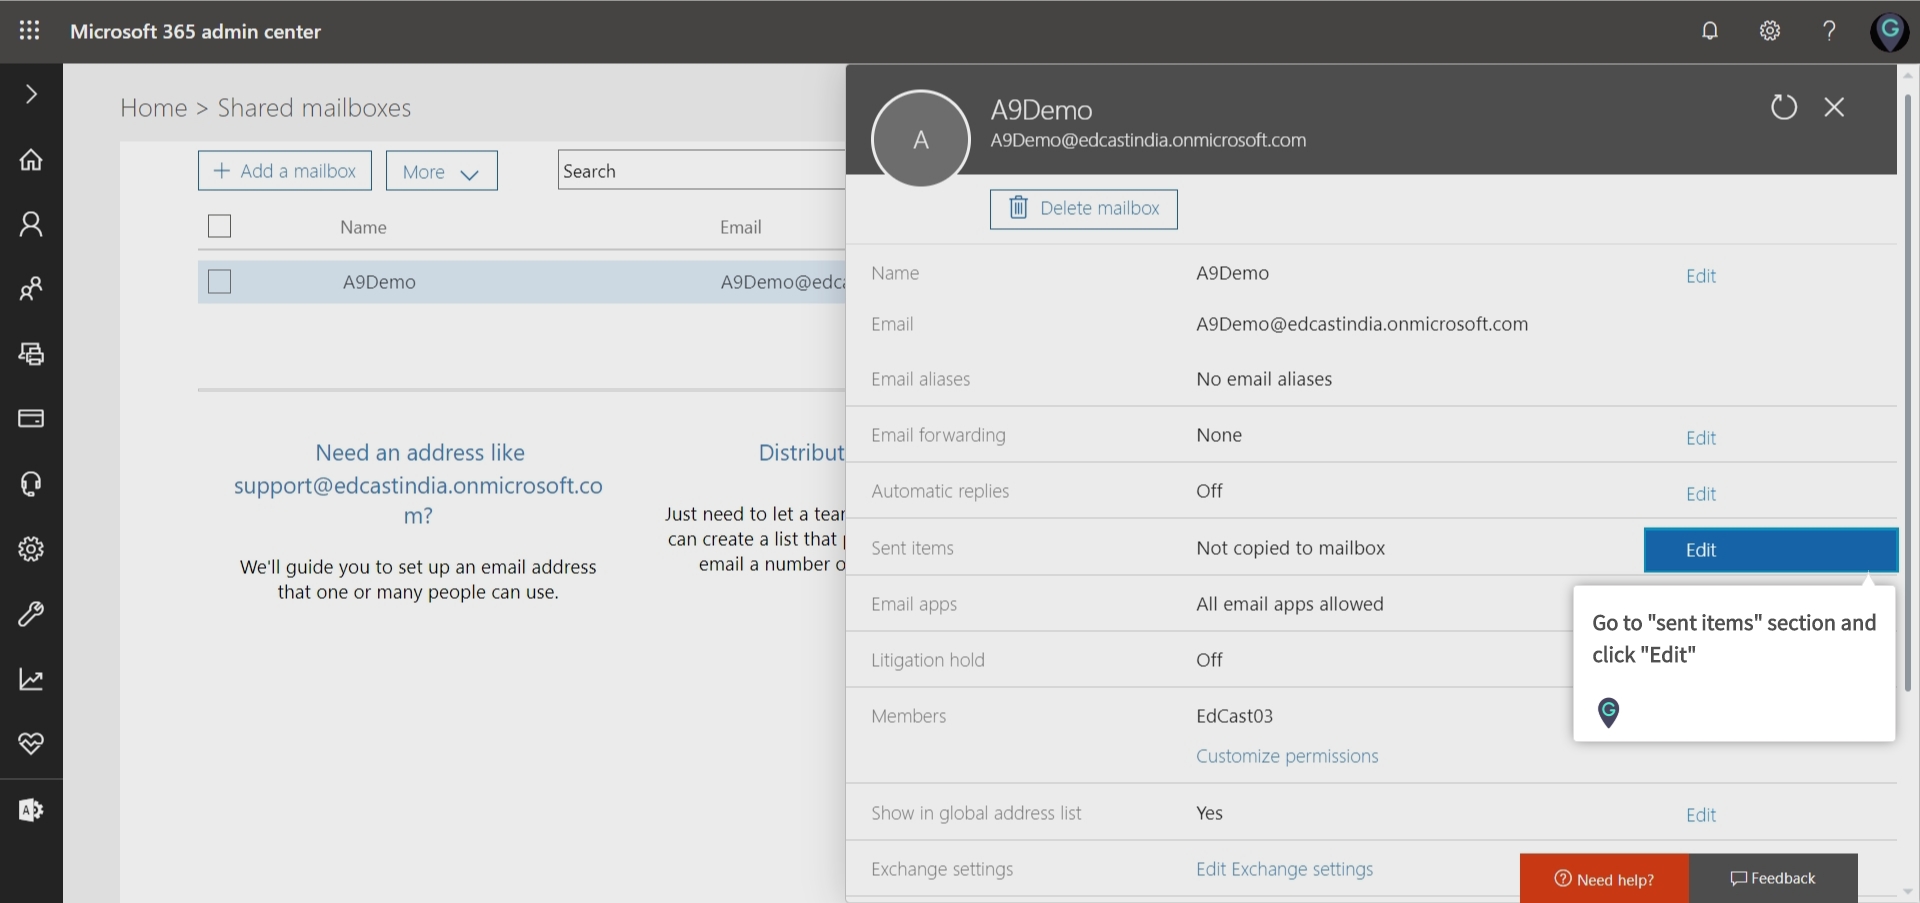
Sign in to the Microsoft 365 Admin Center; Navigate to Teams and Groups -> Shared mailboxes; Select the shared mailbox you want to configure; Locate the Sent Items section in the mailbox settings and click Edit; There are two options available here: Copy items sent as this mailbox Copy items sent on behalf of this mailbox
Save sent items in shared mailbox o365info
Shared mailboxes set up correctly but within Outlook 2013 or 2016 if user sends on behalf of the , Sent items of Sender is populated but nothing is delivered to Shared mailbox/Sent Items. BUT, if same user uses OWA and sends on behalf of , both Sender and Shared Mailbox Sent Items are populated as expected. Any help/suggestion is appreciated!
Save sent items in shared mailbox with PowerShell ALI TAJRAN
Choose More Settings > Advanced > Add. Type the shared email address, such as [email protected]. Choose OK > OK. Choose Next > Finish > Close. Send mail from the shared mailbox Open Outlook. Choose New Email. If you don't see the From field at the top of your message, choose Options > From.

Managing Shared Mailbox Sent Items in Exchange 2013
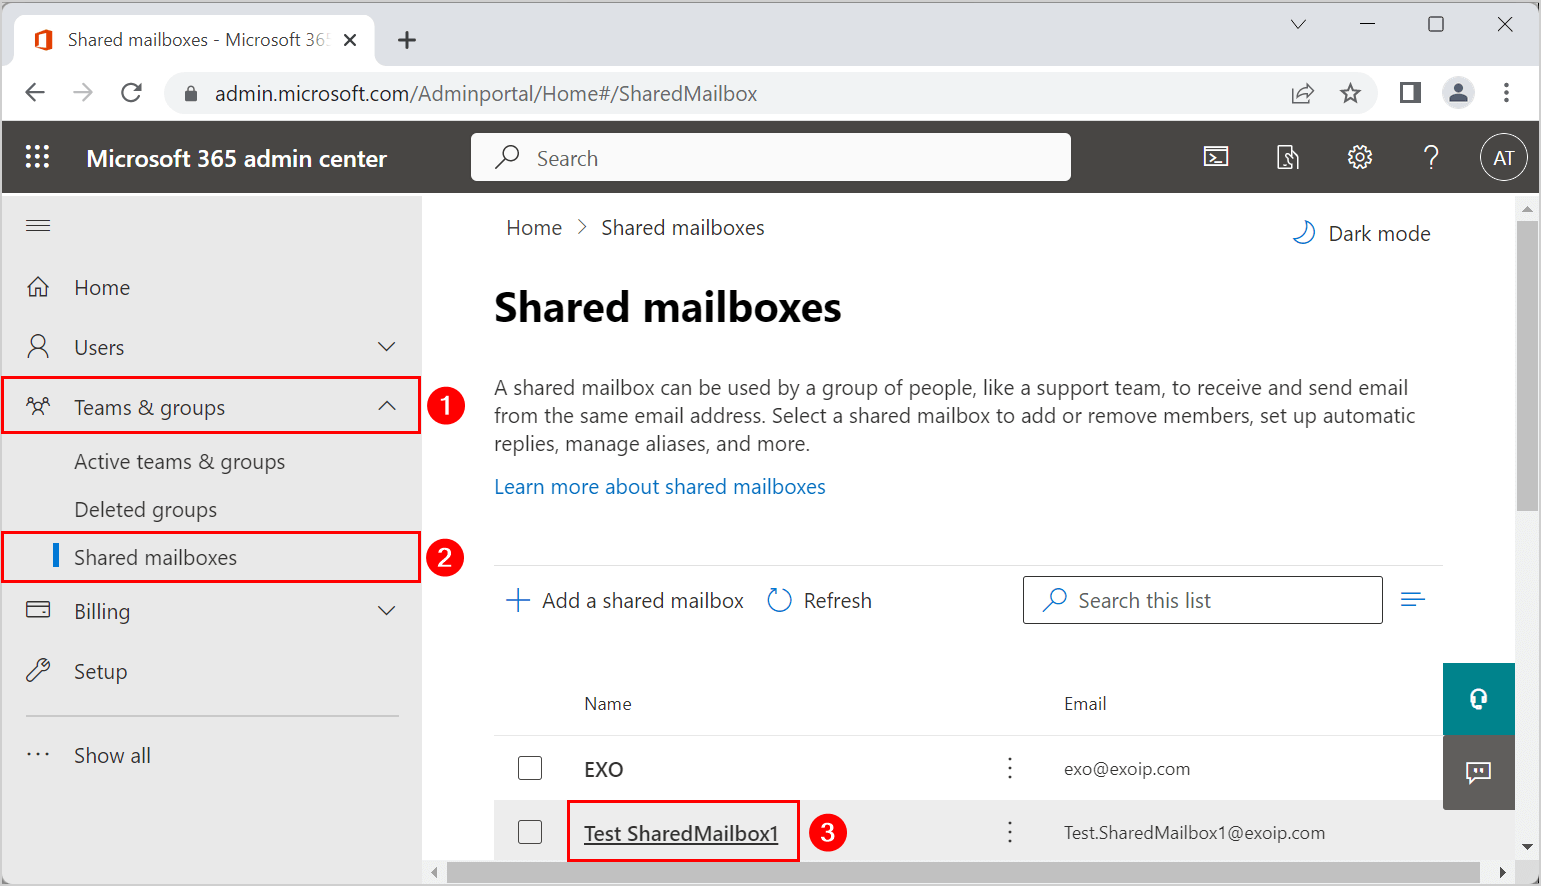
1. Visit admin.microsoft.com and login. 2. Click Groups, then shared mailboxes. 3. Click the shared mailbox, then click "Edit" under "Sent Items" 4. Enable the copied items options. That's it! Your team's sent emails will now show up in the Sent Items folder of the shared mailbox when they send emails.
Creating a Shared Mailbox in an Exchange Hybrid using PowerShell TechLabs
To configure the sent items behaviour for shared mailboxes we use the Set-MailboxSentItemsConfiguration cmdlet. This is available in Exchange Server 2010 SP3 but not yet available in Exchange Server 2013 at the time this article is being written. There are two parameters we can use: -SendAsItemsCopiedTo -SendOnBehalfOfItemsCopiedTo
How do I get sent items to display in my Outlook shared mailbox? EmailAnalytics
Users do have send as or send on behalf permissions for shared mailboxes. They do like to save sent items in shared mailbox sent items folder automatically when they sent an email. In this article, you will learn how to enable save sent items in shared mailbox with PowerShell. The feature is available in Exchange on-premises and Exchange Online.

Save Sent Items in Shared Mailbox Sent Items folder
Select Save. Send automatic replies from a shared mailbox In the admin center, go to Teams & groups > Shared mailboxes. Select the shared mailbox you want to edit, then select Edit under Automatic replies. Select the checkbox to Send automatic replies to senders inside this organization.

Save Sent Items in Shared Mailbox Sent Items folder
Login to Microsoft 365 admin center. Expand 'Teams & Groups' and select 'Shared mailboxes.' Click on the shared mailbox you want to change. Click Edit at the right of the 'Sent items.' Select both 'Copy items sent as this mailbox' and 'Copy items sent on behalf of this mailbox.'
How to Save Sent Items in Shared Mailbox Microsoft 365 Scripts
A Microsoft 365 shared mailbox allows a group of two or more users to send and receive emails from the same email address. As a result, the group can always see the same inbox. By default, the emails sent from one person in the group can't be seen by the other users.
How to allow members to see the sent emails of shared mailbox in Office 365 Admin Center A
Emails can be sent as the shared mailbox itself or on behalf of it by member (s) of the mailbox, assuming proper permissions have been granted. This feature is designed to retain a copy of an email sent from the shared mailbox in the Sent Items folder of the shared mailbox.
How to save sent items in shared mailbox o365info
First, go to Microsoft Outlook. Access Microsoft Admin via the app launcher on Outlook. Click the 'Teams & Groups' tab of options to see the dropdown menu. From here, click 'Shared mailboxes'. In the resulting menu, click the mailbox you wish to edit. On the submenu that pops up, look for the 'Sent Items' sub-option. Click 'Edit'.
Save sent items in shared mailbox with PowerShell ALI TAJRAN
Solution More information Problem Assume that you're using Microsoft Outlook 2010 or a later version, and you've been delegated permission to send email messages as another user or on behalf of another user from a shared mailbox.

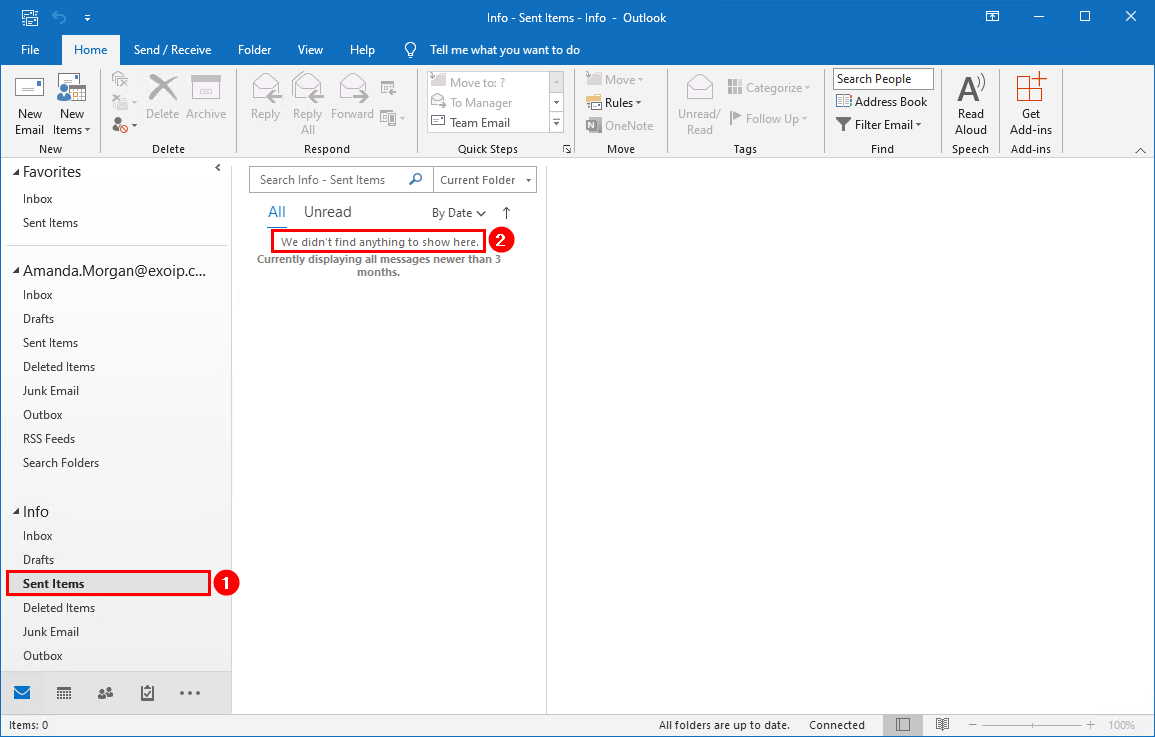
Messages sent from a shared mailbox aren't saved to the Sent Items folder of the Shared Mailbox
When you send a message from the shared mailbox, the sent message goes into your own Sent Items folder. By default, sent messages are stored in your own mailbox, not the shared mailbox and the DelegateSentItemsStyle registry value is used if you want to store the messages in the shared mailbox Sent Items folder.